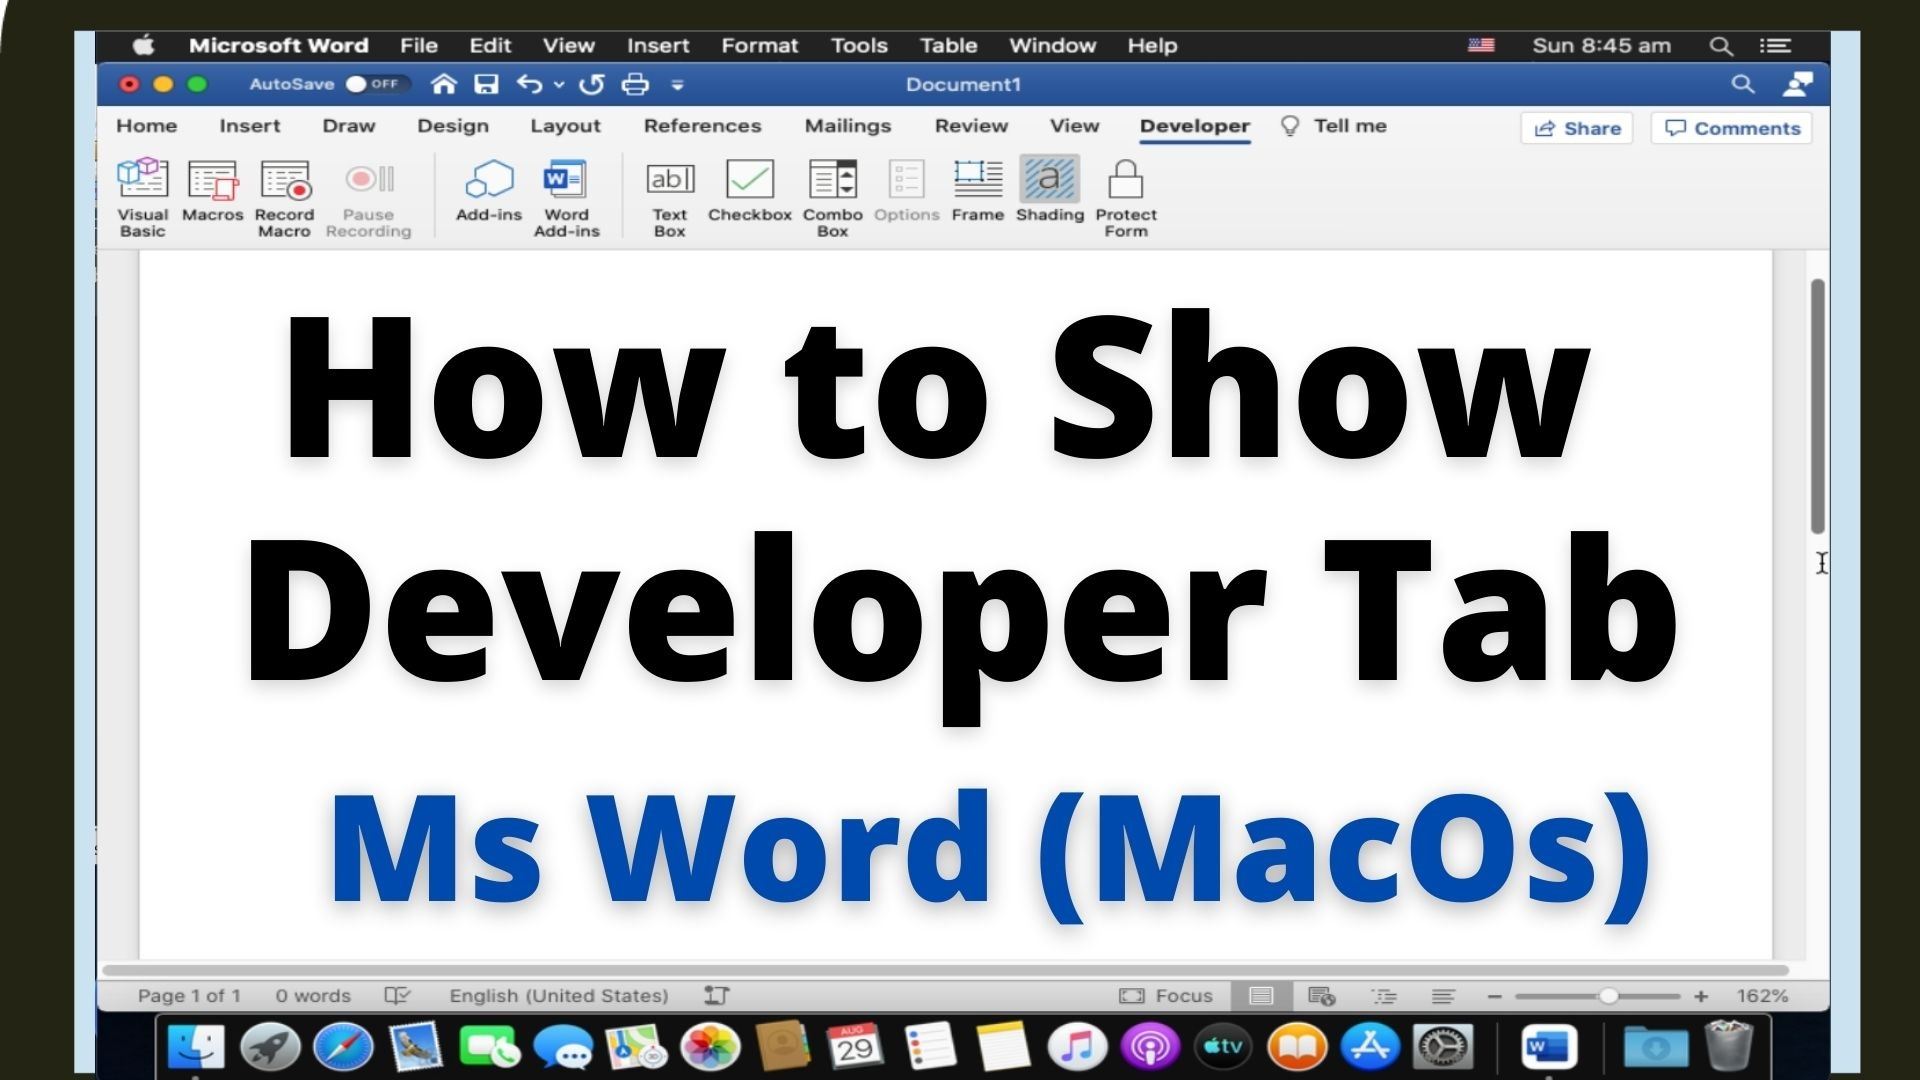
Developer tab give Word user additional advance options like write/record and run Macro, Active-X control, XML command etc. However, it’s not available in Word by default and you need to enable it with one time setting. In our earlier blog, we covered how to enable/show developer tab in Ms Word for Windows. This blog covers how to do the same in Ms Word for Mac along with video tutorial.
The following steps show how to add developer tab in Microsoft Word for Mac
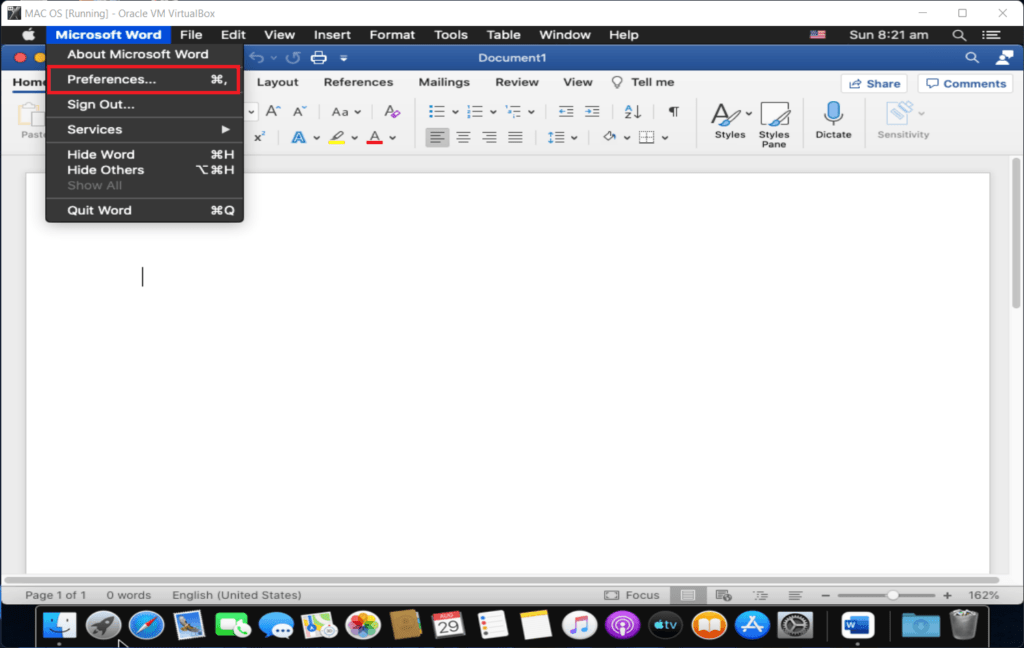
1. Go to Microsoft Word > Preference to open Word Preference window. Alternatively, you can also use keyboard shortcut “Command + ,”

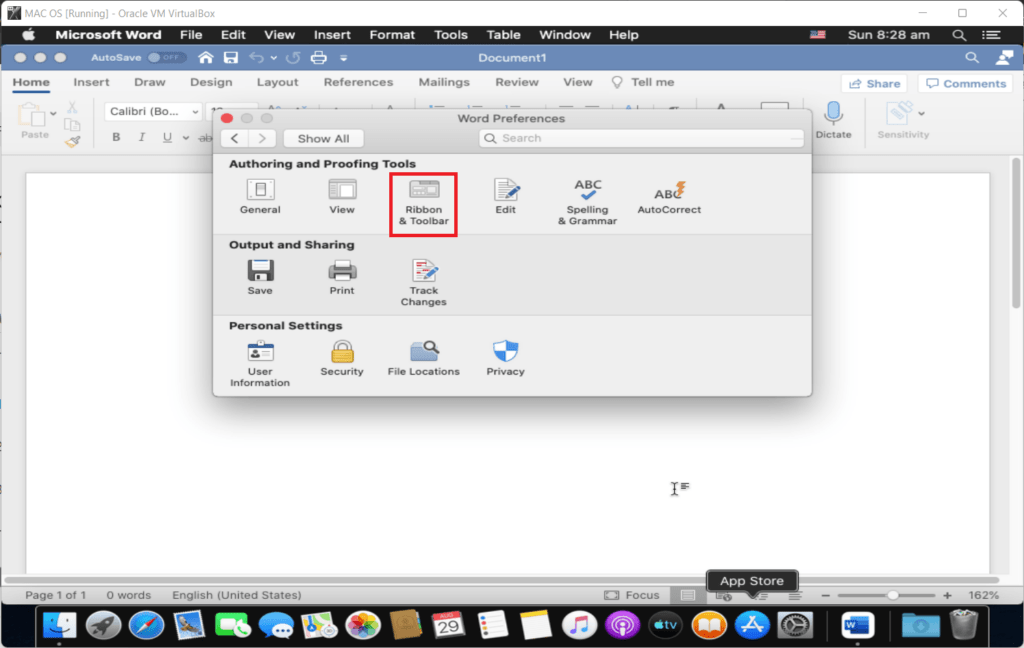
2. In the Word Preference window click “Ribbon & Toolbar” (under Authoring and Proofing Tools)

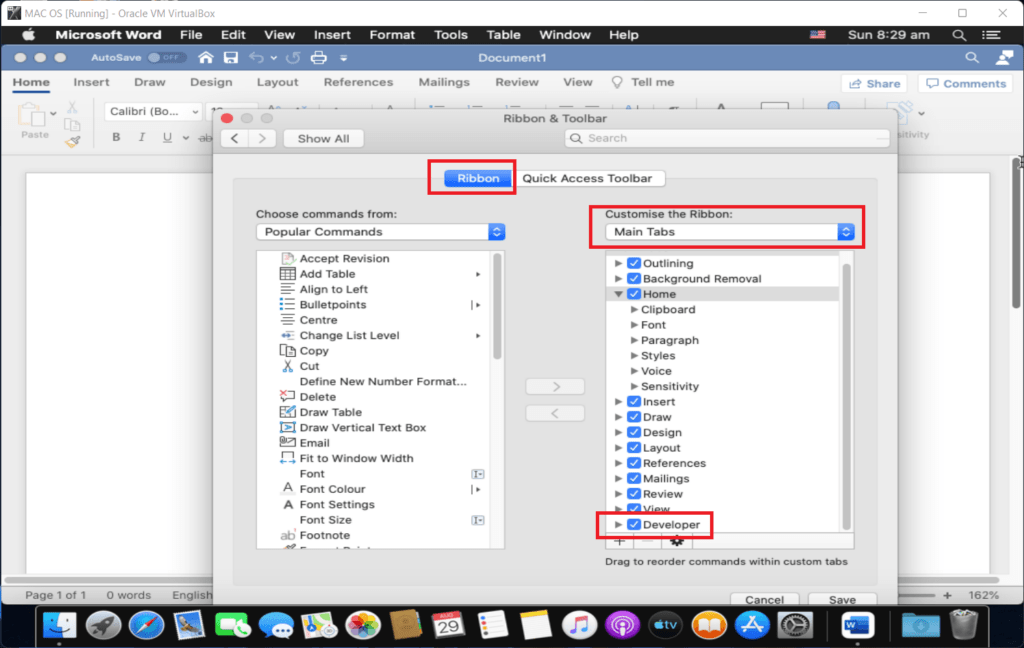
3. Click Ribbon Tab, and select “Main Tab” under Customize the Ribbon. Then check the box against “Developer” and click “Save” to apply changes and show Developer Tab.

Video tutorial on how to add developer tab in Ms Word (Mac & Windows)
Related Posts

C P Gupta is a YouTuber and Blogger. He is expert in Microsoft Word, Excel and PowerPoint. His YouTube channel @pickupbrain is very popular and has crossed 9.9 Million Views.

great article, found it really useful
Thanks dear.
Pingback: How to find Strikethrough Text in Microsoft Word - PickupBrain: Be Smart
Thank you! This was the only helpful instruction and it worked.
Thanks dear for the comment, glad to know it worked.