Introduction
Text wrapping feature of Microsoft Word defines the way text flows around an image or other objects within a document. Whether you are creating a business report, a newsletter, thesis or a personal project, understanding how to manipulate text and image placement is essential for achieving a balanced and visually pleasing layout. Text wrapping options provides flexibility in design, allowing users to position images and text in a manner that best suits the content’s purpose.
Microsoft Word offers several text wrapping styles to choose from, each serving different formatting needs. In the following sections, we will delve deeper into each wrapping style, providing detailed explanations and practical examples to help you master the art of image and text wrapping in Microsoft Word.
Exploring Different Text Wrapping Options
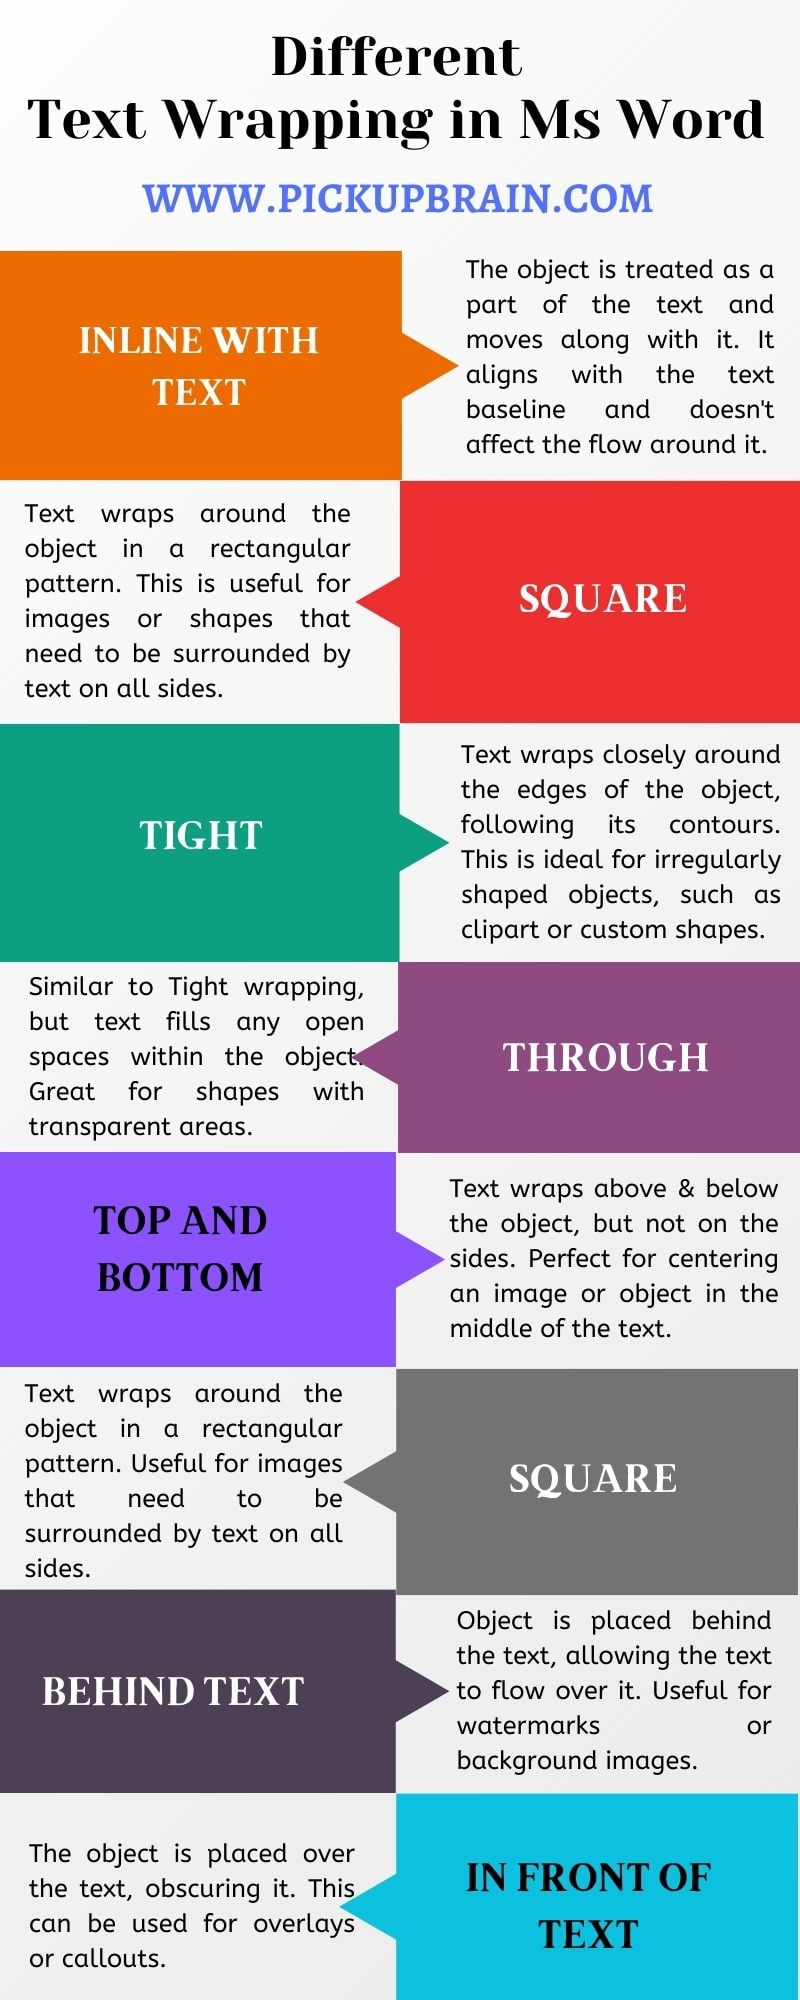
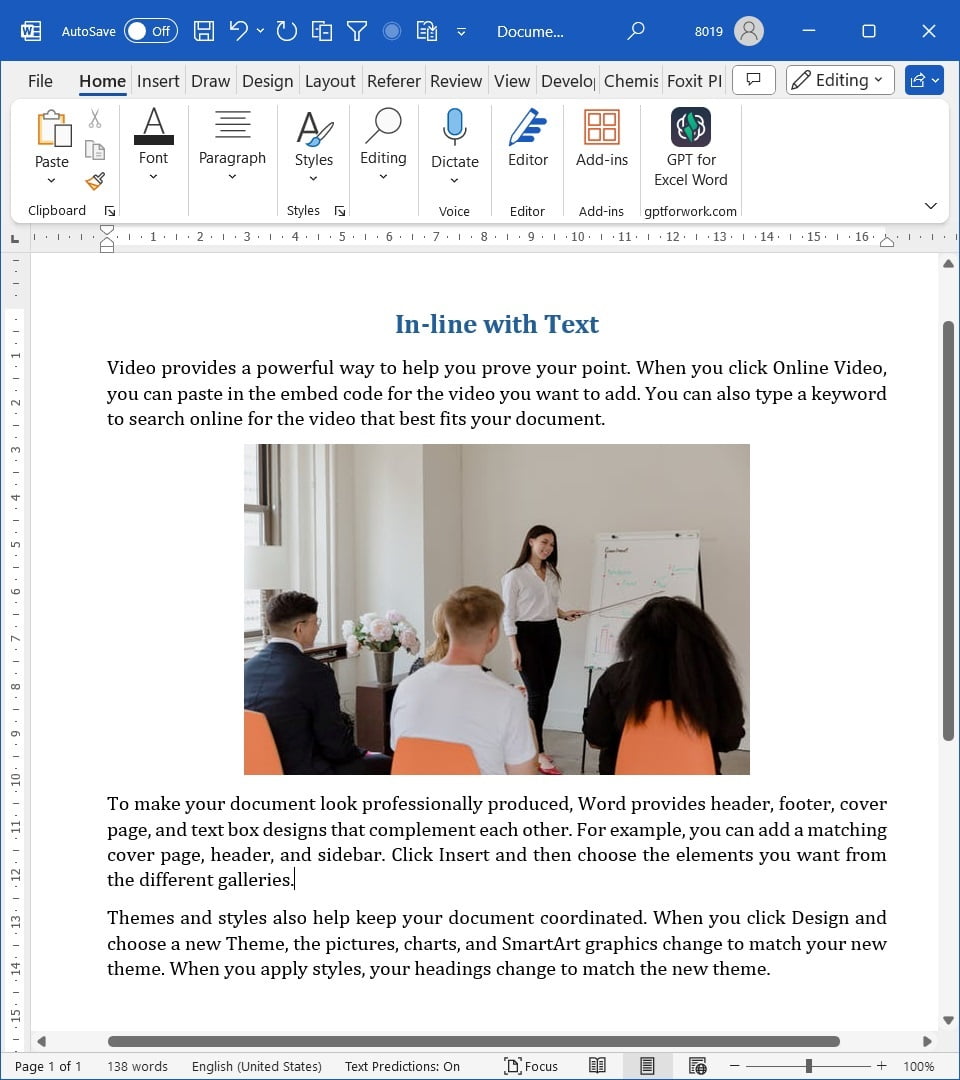
‘In Line with Text’: This is the default setting where the image is treated as a part of the text line, much like a character. This option is ideal for simple documents where minimal formatting is required. To apply, select the image, navigate to the ‘Picture Tools’ format tab, and choose ‘In Line with Text’ from the ‘Wrap Text’ menu.
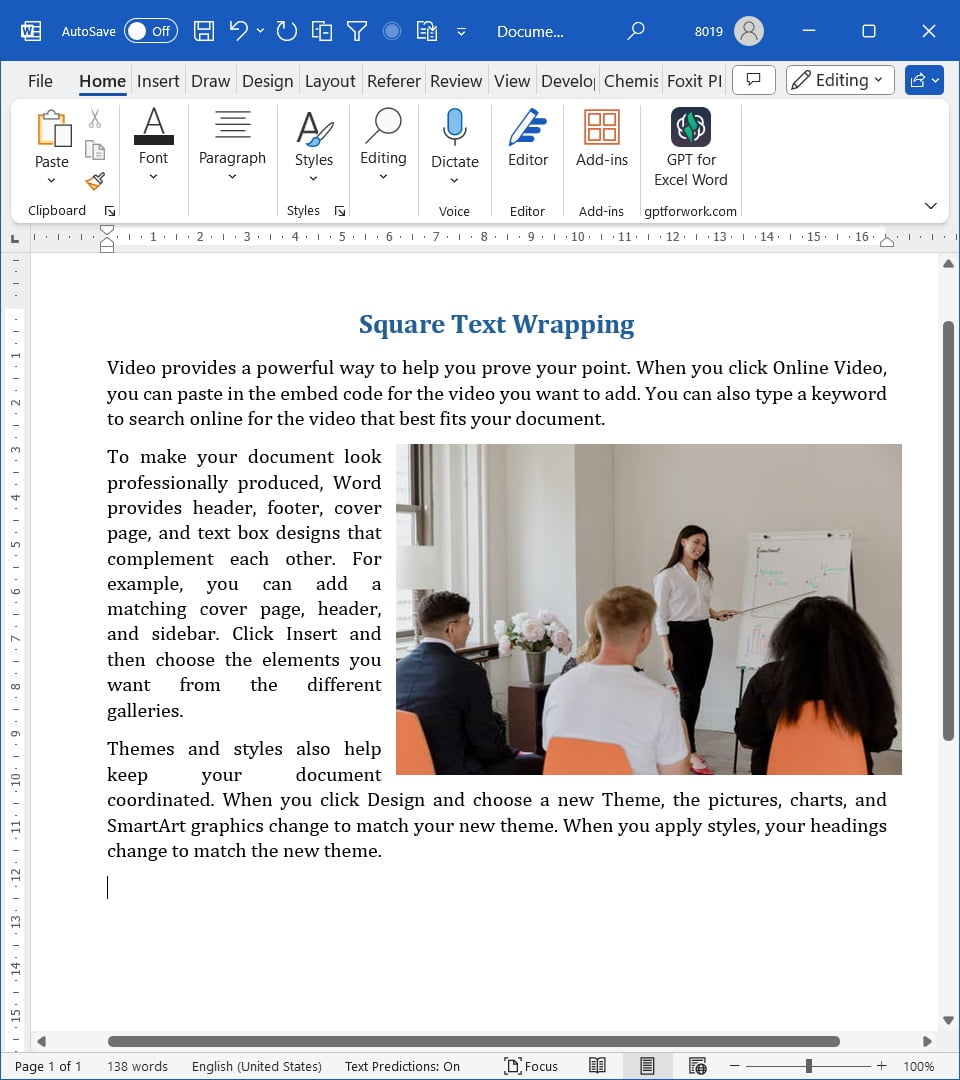
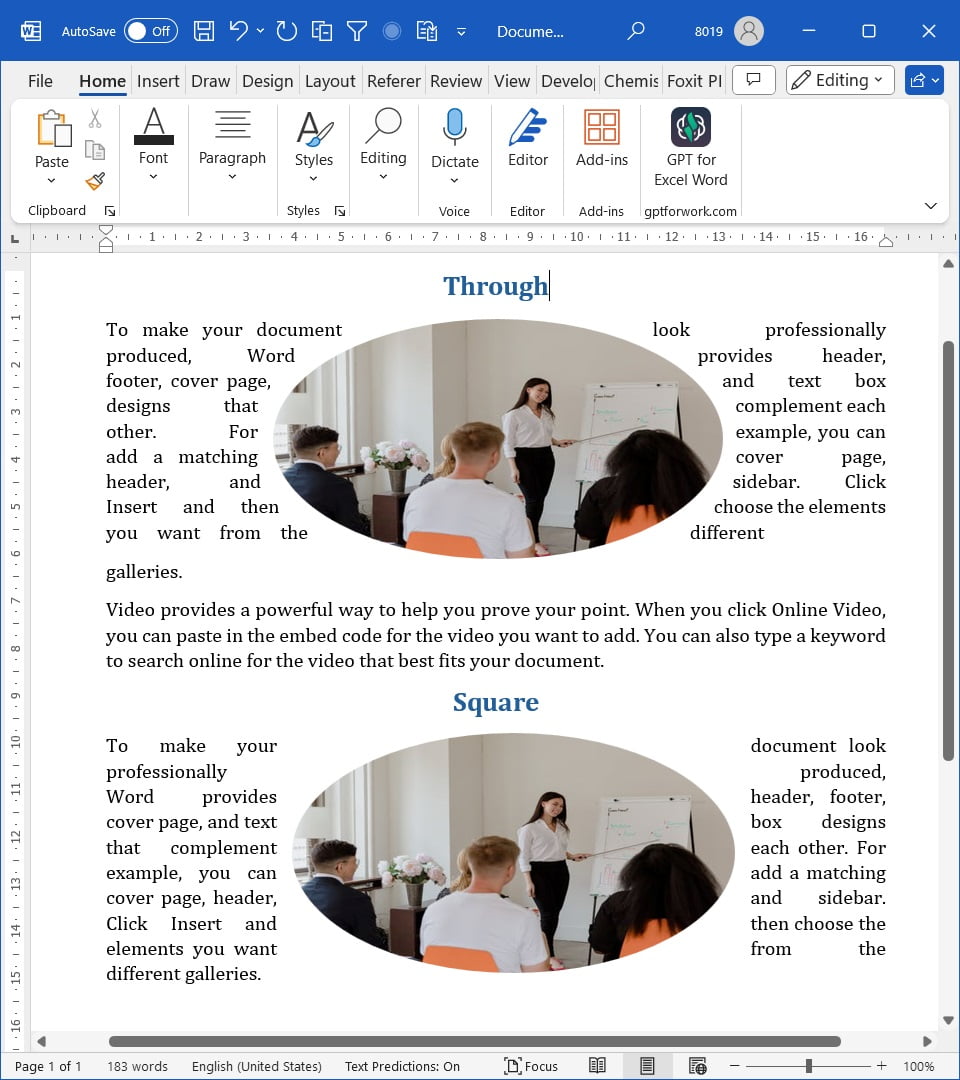
‘Square’: With this option, the text wraps around the image, forming a rectangular block. This is useful for documents where you want the image to stand out but still maintain a structured layout. To use this, click on the image, go to the ‘Picture Tools’ format tab, and select ‘Square’ from the ‘Wrap Text’ menu.
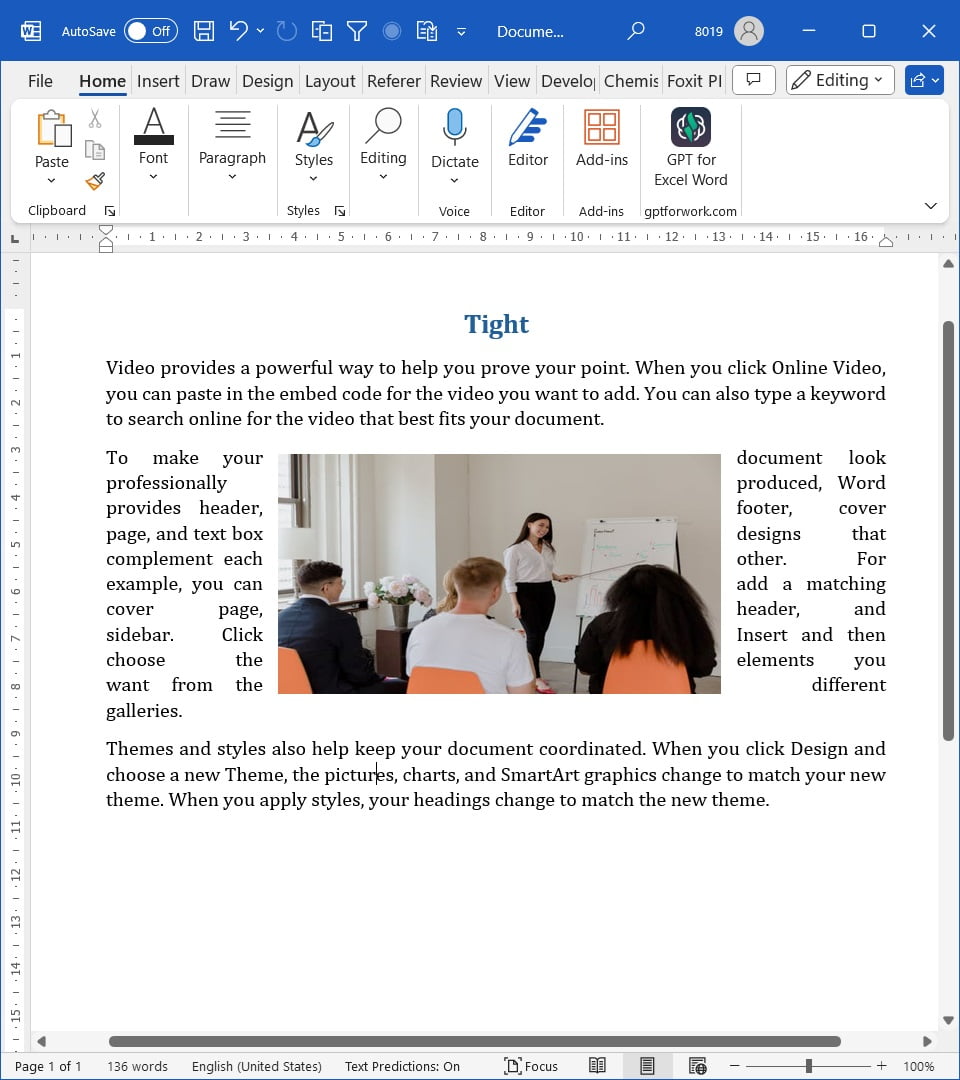
‘Tight’: Similar to the ‘Square’ option, ‘Tight’ wrapping allows the text to flow closely around the image, hugging its contours. This style is perfect for intricate images or logos where you want the text to follow the image’s shape closely. Apply it by selecting the image, clicking on the ‘Picture Tools’ format tab, and choosing ‘Tight’ from the ‘Wrap Text’ menu.
‘Through’: This advanced option allows text to flow through the transparent areas of an image, creating a more integrated look. This is particularly effective for images with irregular shapes and transparent backgrounds. The difference between through and square is more visible when image shape is other than square. To apply ‘Through’ wrapping, select the image, go to the ‘Picture Tools’ format tab, and choose ‘Through’ from the ‘Wrap Text’ menu.
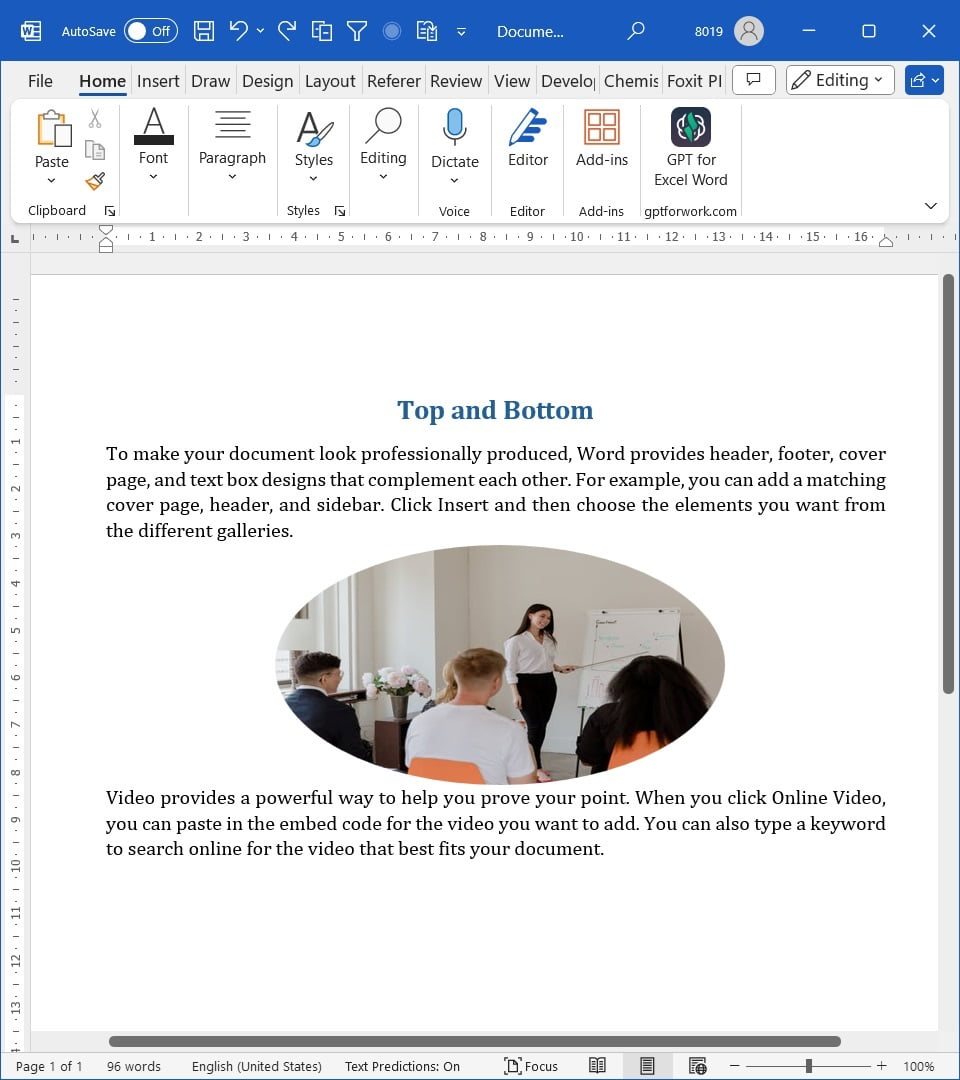
‘Top and Bottom’: This wrapping style places the text above and below the image, creating a clear separation. It is ideal for emphasizing an image without interfering with text flow. To use this option, click on the image, navigate to the ‘Picture Tools’ format tab, and select ‘Top and Bottom’ from the ‘Wrap Text’ menu.
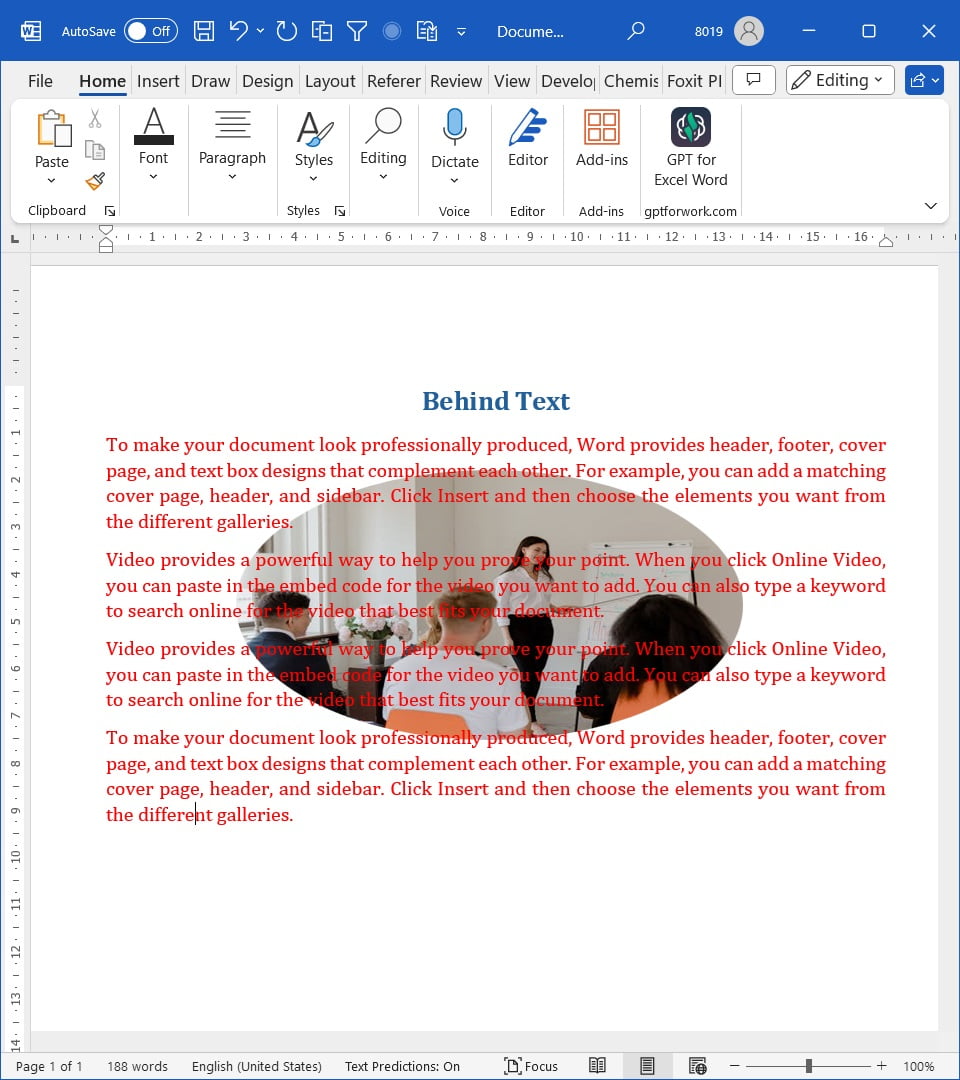
‘Behind Text’: Placing an image behind the text can create a watermark effect or a background image. This option is useful for adding subtle branding or decorative elements to a document. To apply it, select the image, go to the ‘Picture Tools’ format tab, and choose ‘Behind Text’ from the ‘Wrap Text’ menu.
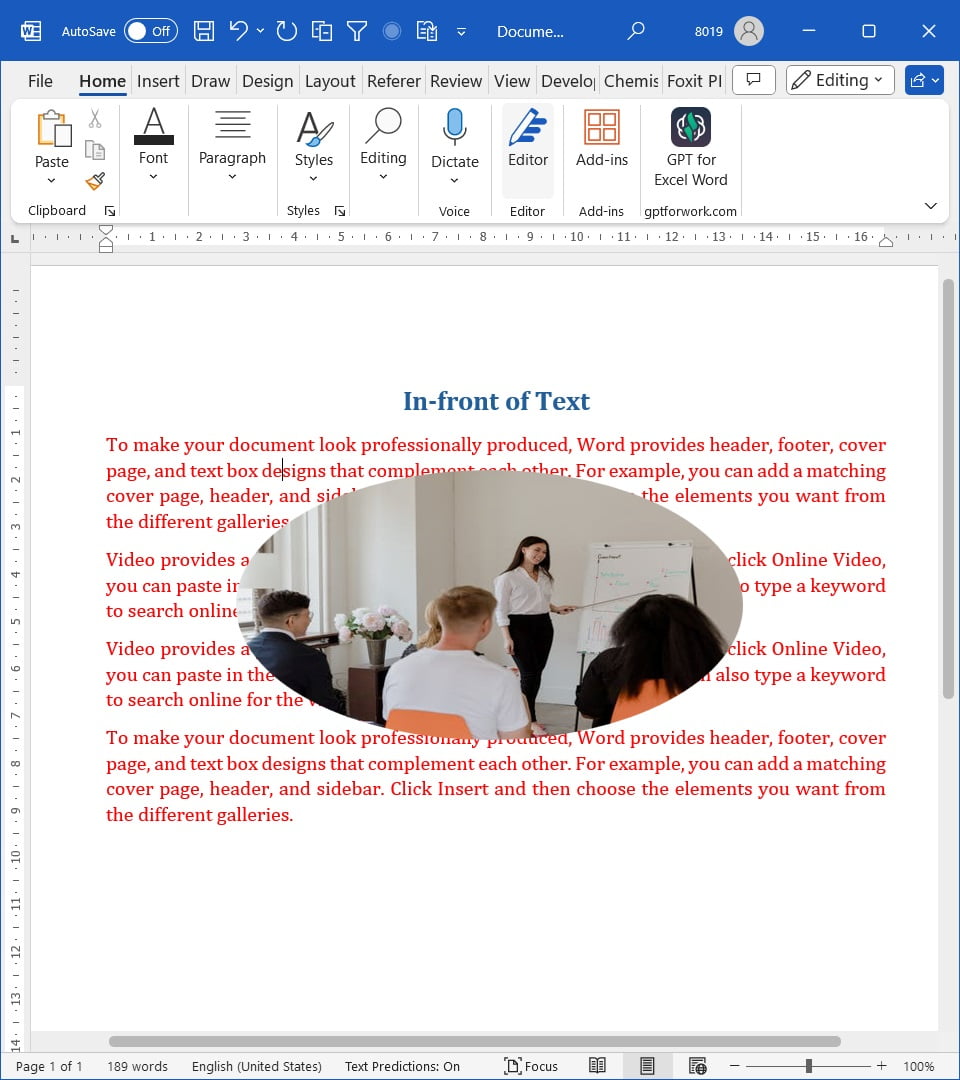
‘In Front of Text’: This option places the image over the text, allowing it to overlap. It’s useful for creating layered effects or emphasizing an image by placing it prominently over the text. To use this, select the image, click on the ‘Picture Tools’ format tab, and choose ‘In Front of Text’ from the ‘Wrap Text’ menu.
By mastering these text wrapping options, you can ensure your documents are both visually appealing and effectively structured, enhancing the reader’s experience and engagement.
Advanced Customization Techniques: Wrap-point
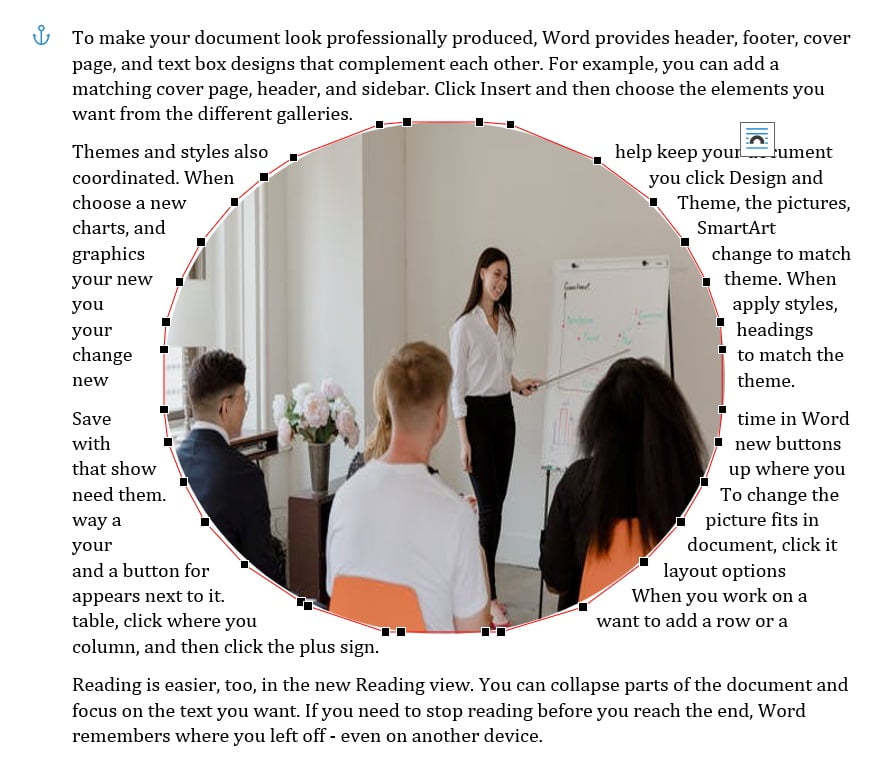
One of the key features to explore is manipulating wrap points. Wrap points are the individual markers that control how text wraps around the edges of an image. By adjusting these points, you can create more precise and customized text flow around irregularly shaped images, ensuring that the content looks polished and professional.
To adjust wrap points, select the image and go to the “Format” tab. Click on “Wrap Text” and then “Edit Wrap Points.”
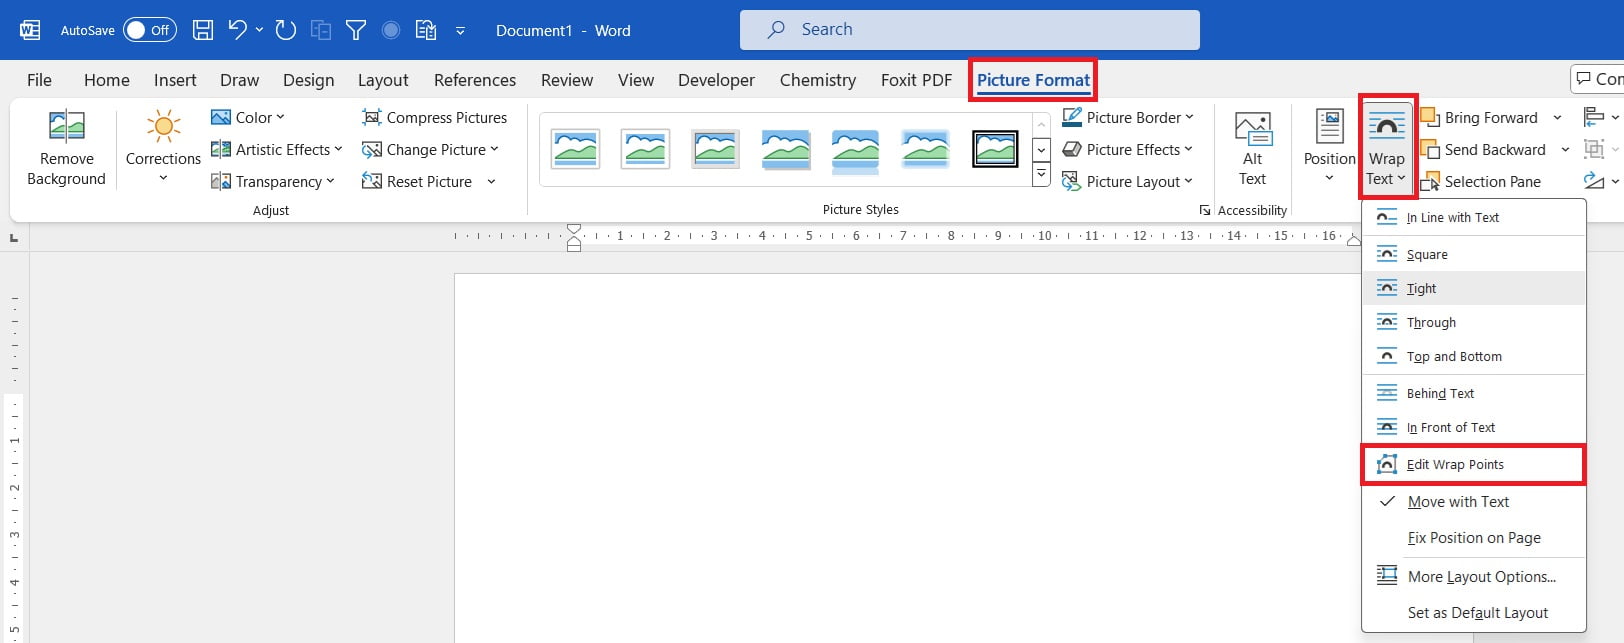
This will display a series of small black squares around the image, which you can drag to redefine the wrapping boundaries. This technique is particularly useful for images that do not conform to standard rectangular shapes, allowing for a more tailored integration with the surrounding text.
Practical Applications and Tips
Newsletter: One common application is in the creation of newsletters. By strategically placing images with the ‘Square’ or ‘Tight’ wrapping options, you can make the layout more engaging, drawing readers’ attention to key articles and features.
Reports: Using the ‘Through’ wrapping option allows images to seamlessly flow with the text, making complex data presentations more digestible and visually appealing.
Brochures and flyers: ‘Behind Text’ and ‘In Front of Text’ options can be particularly useful here, allowing for creative freedom when layering images and text to create striking visual effects. For instance, placing a company logo ‘Behind Text’ can maintain brand visibility without obstructing the main message.
Summary
By mastering the use of image and text wrapping options in MS Word, you can greatly enhance the quality and effectiveness of your documents, ensuring they are both visually appealing and easy to read. Ms Word provided different text wrapping options like In line with text, square, tight, top and bottom etc. Each one has its own visual appeal and use case. After understanding their properties, select the one that fits best suits your document.

C P Gupta is a YouTuber and Blogger. He is expert in Microsoft Word, Excel and PowerPoint. His YouTube channel @pickupbrain is very popular and has crossed 9.9 Million Views.