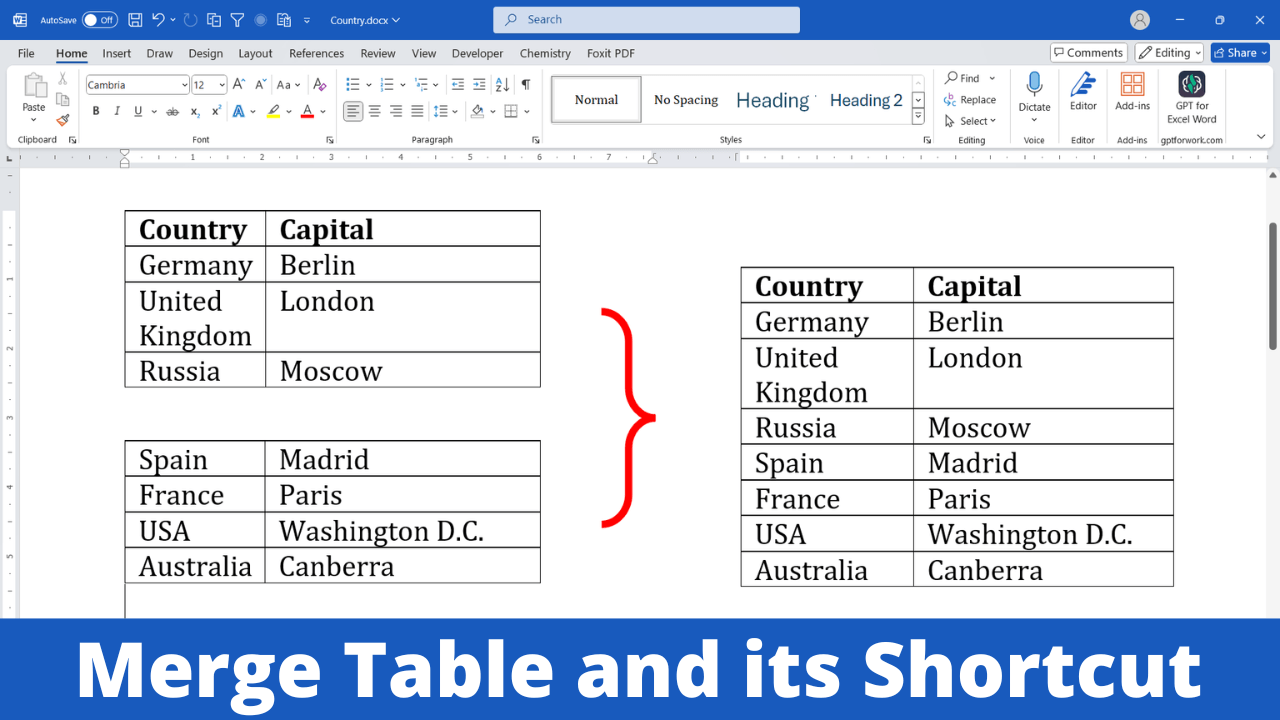
Introduction to Merging Tables in Microsoft Word
Ever found yourself stuck with two tables in a Microsoft Word document that you wish could just seamlessly become one? Yet, many users struggle with this task, not knowing where to begin. Don’t worry! This step-by-step guide will walk you through the process with clear instructions and visuals to ensure you can merge tables like a pro.
Step-by-Step Guide to Merging Tables in Microsoft Word
1. Prepare Your Tables
- First step is to remove the text or any other content between the tables to be merged. Sometime simply removing contents between table automatically merges table.
- For proper merging, ensuring that the column counts of both tables match is crucial. If these counts do not align, merged table would not be proper. You can add or remove rows and columns to achieve this, as uniformity is a key factor in creating cohesive, merged tables.
- Also make sure that second table doesn’t have header row (one of the most common reason while merging table as per superuser query)
Method 1: Dragging the bottom table to merge
This is the easiest way to merge table. To merge table
- Select the bottom table by clicking on the cross sign on the upper-left corner of the table
- Drag the table near the bottom most row of the above table.
- Release the mouse
Video demonstration of the above method
Method 2: Delete text and contents in between (Word 2019 and above)
This method works only in the latest version of Ms Word i.e. 2019 and above. Steps to merge 2 table is as follows
- Remove all the contents between two table by deleting or moving it to appropriate place
- Once all the content between 2 table including empty space is removed, two table automatically merges.
Video Demonstration
Method 3: Using the ‘Merge Table’ Command
Use the following steps to merge 2 tables
- Select the first table by clicking cross sign at the top left corner.
- Press “Ctrl+X” to cut the table
- Right click on cross sign at the top left corner of the second table
- Click the merge table icon/option on the context menu.
Video Demonstration
Method 4: Keyboard shortcut
The main idea of merging table is to move one table closer to another table so that Ms Word will automatically merges them. This can be done by deleting/removing contents between table or my manually moving table close to each other. In this method we will use keyboard shortcut to achieve this task.
To merge table using keyboard short use the following steps
- Select the entire second table by clicking the cross sign in top left corner of the table
- Press “Shift+Alt+Up arrow” to more entire table
- Continue above table till it reaches bottom of the first table and release keys.
Video demonstration
Troubleshooting Common Issues
Occasionally, merged tables might not display correctly. Below common issue with merged table and their solution.
Misaligned column of merged table
This is one common issue while merging table with different column width. To fix this,
- Select the entire table by clicking cross sign on top left corner of table and
- Navigate to Table Layout > AutoFit and select the following options
- Choose AutoFit to Contents to adjust column width automatically as per contents size or opt for Fixed Column Width if you prefer manual adjustments.
Video Demonstration
Following these steps will ensure a seamless process when merging tables in Microsoft Word, making your documents more professional and easier to read.
Summary
We have covered different ways to merge table in Ms Word and also provided solution to commonly encountered problems while merging table.
Related Posts

C P Gupta is a YouTuber and Blogger. He is expert in Microsoft Word, Excel and PowerPoint. His YouTube channel @pickupbrain is very popular and has crossed 9.9 Million Views.
