Introduction
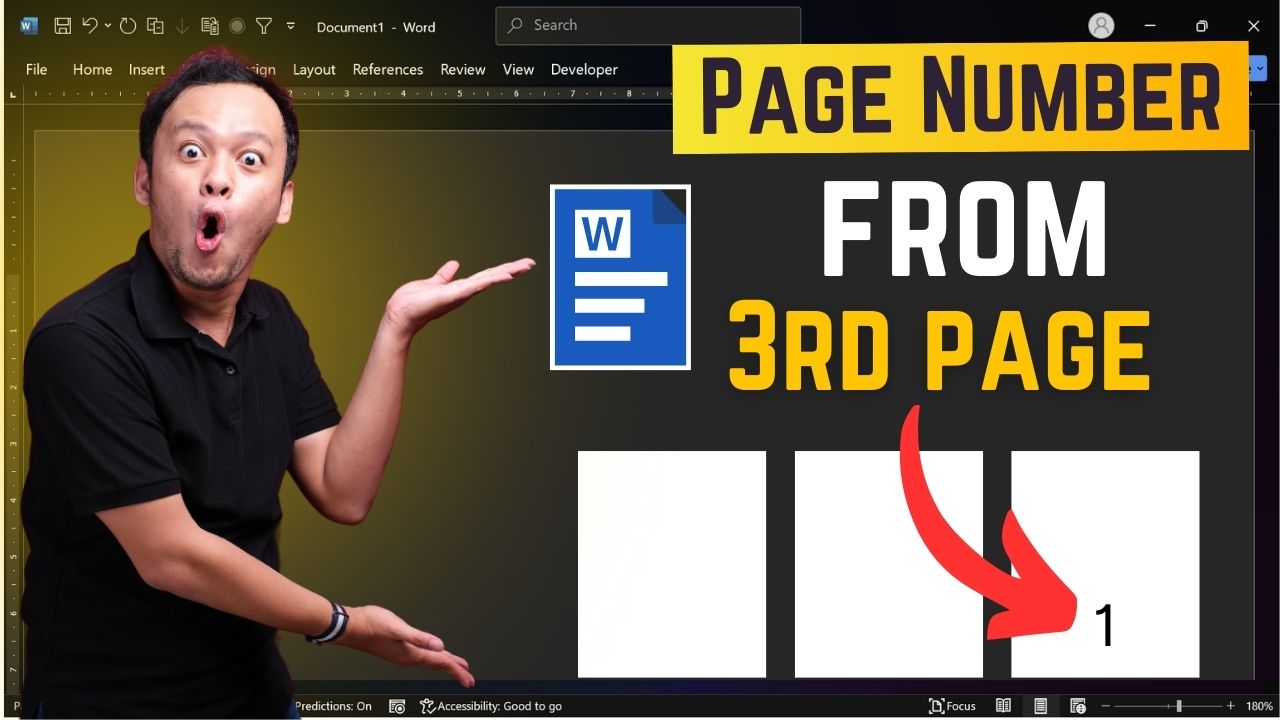
Have you ever needed to start page numbering in your Microsoft Word document from page 3, skipping the first two pages? This is commonly required for thesis papers, reports, and formal documents where the first pages contain a cover page or table of contents.
In this guide, you’ll learn step-by-step how to insert page numbers starting from page 3, remove page numbers from the first two pages, and troubleshoot common issues.
Step 1: Insert Page Numbers
- Go to Insert tab > Click Page Number in the Header & Footer section.
- Choose where you want the page number to appear (e.g., Bottom of Page → Plain Number 2).

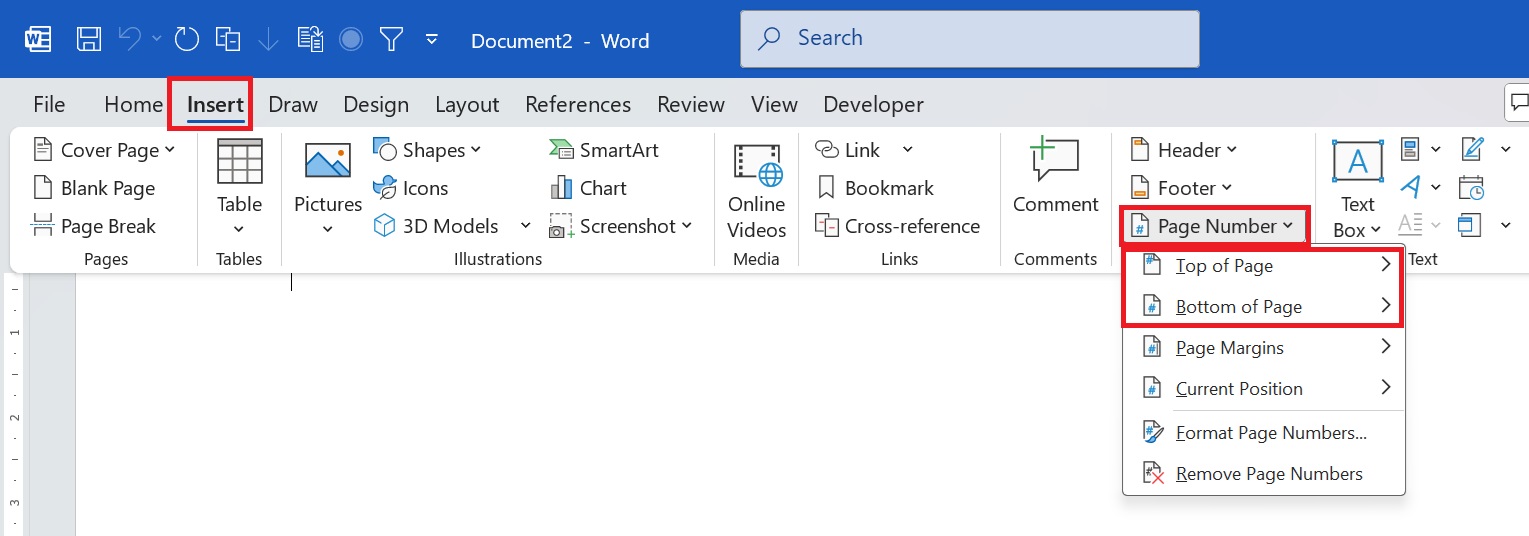
At this point, page numbers will appear on all pages, including the first two. Next, we’ll fix that.
Step 2: Insert a Section Break Before Page 3
- Click at the Start of page 3 (Page after from where you want to start numbering).
- Click the Layout tab > Click Breaks > Select Continuous.

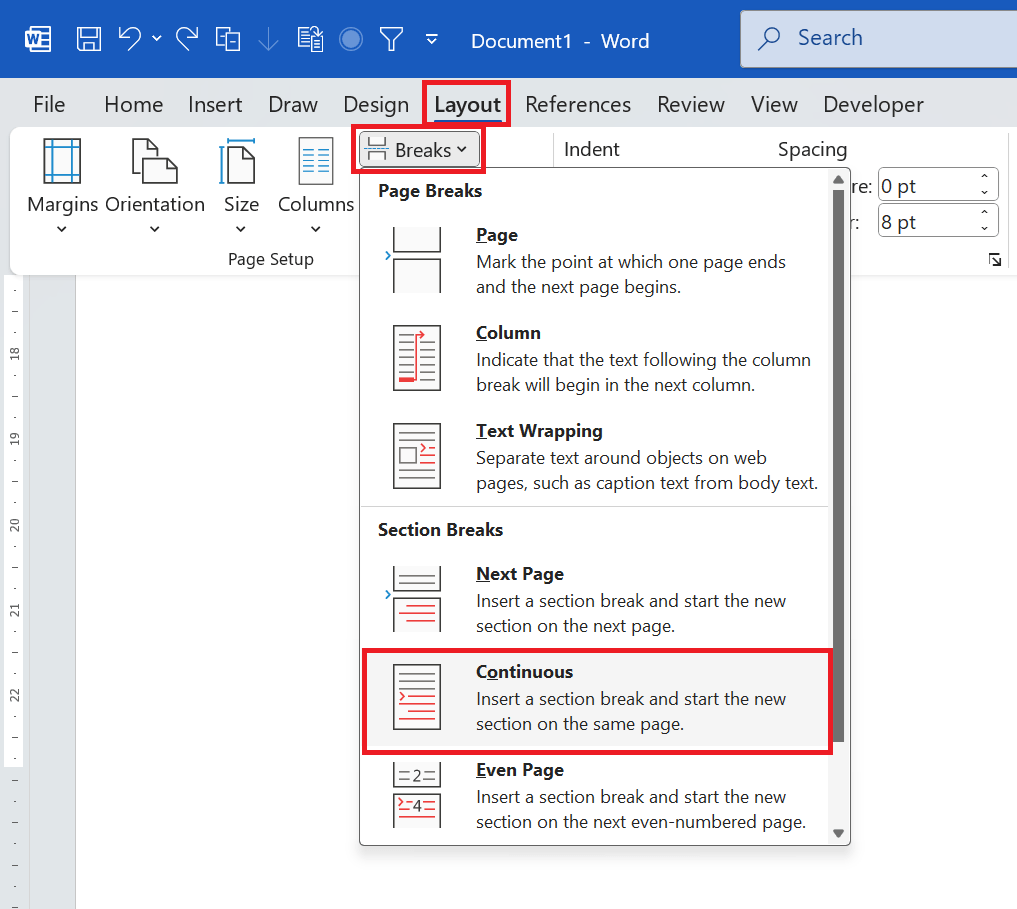
This creates a section break, allowing different formatting for the first two pages and the rest of the document.
Step 3: Unlink the Sections
- Double-click inside the footer or header of page 3.
- Click Header & Footer → Click Link to Previous to disable it (if it is highlighted).

- Repeat for both the header and footer.
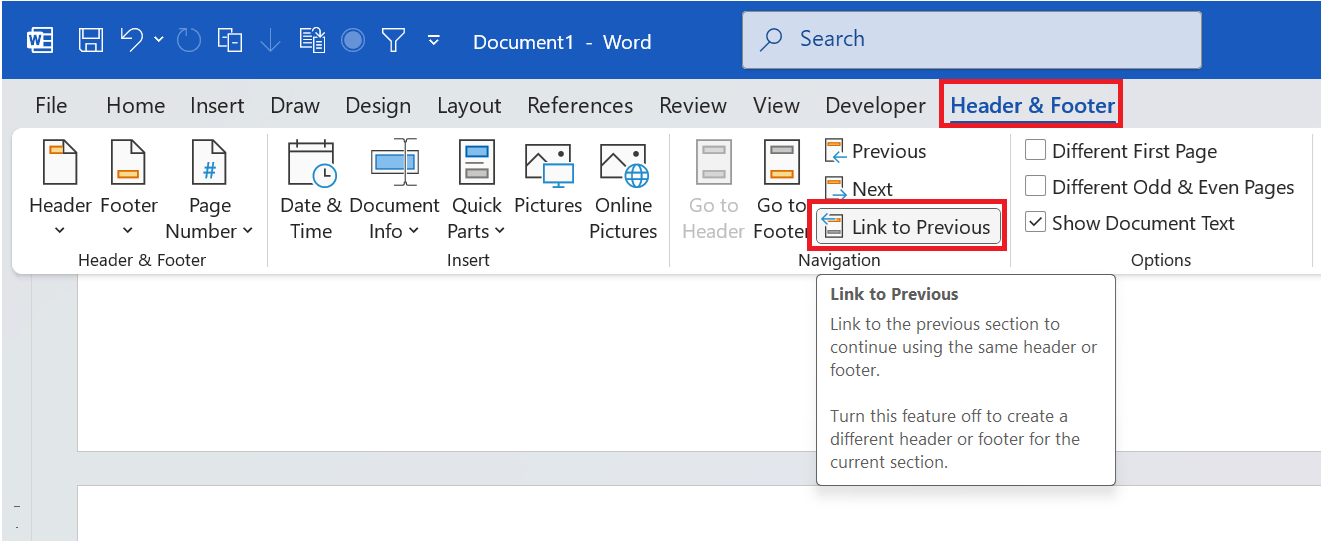
This ensures that the page numbering in section 2 is independent of section 1.
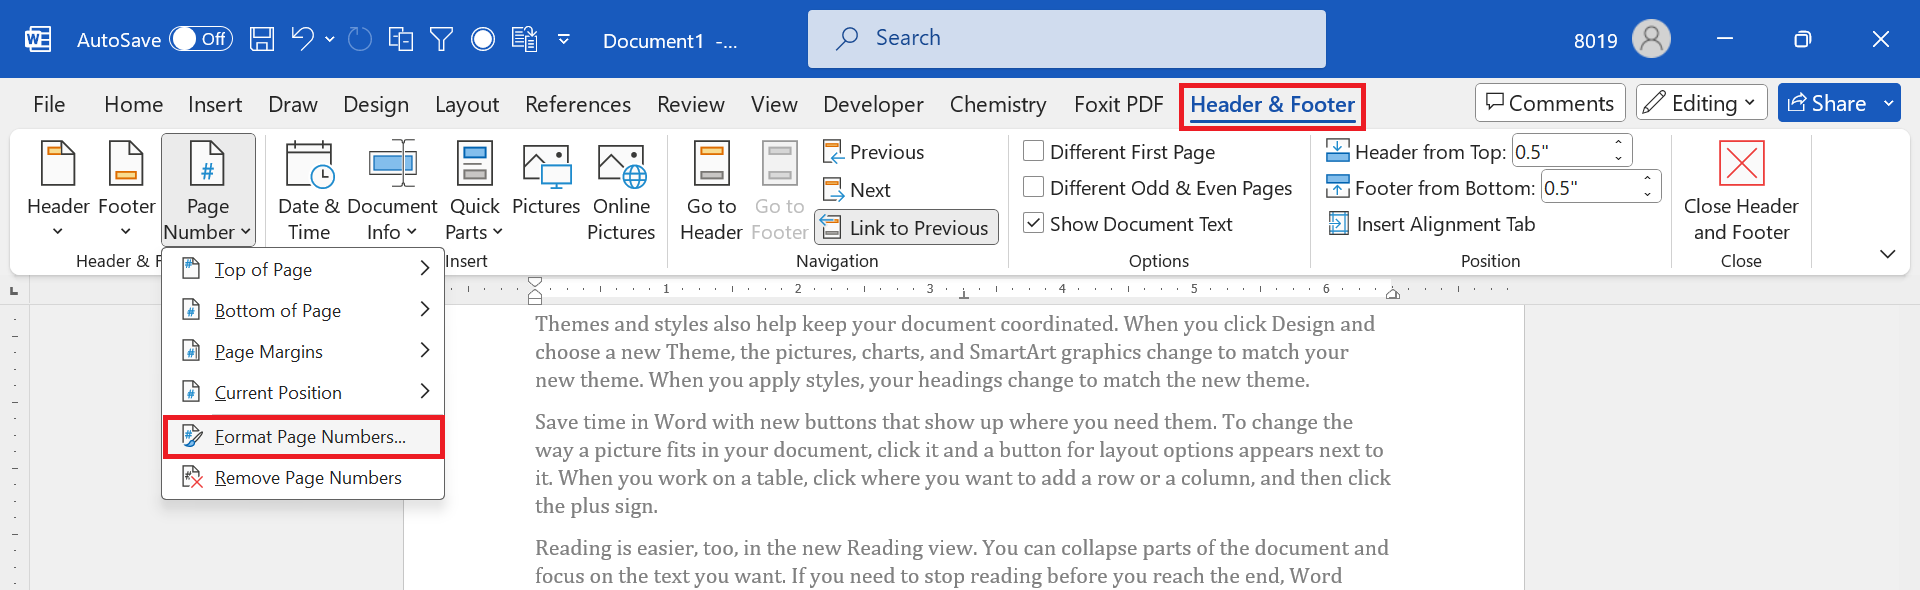
Step 4: Format Page Numbering to Start from 1
- Double-click the page number on page 3.
- Click Page Number → Format Page Numbers.

- In the Start at box, type 1 → Click OK.

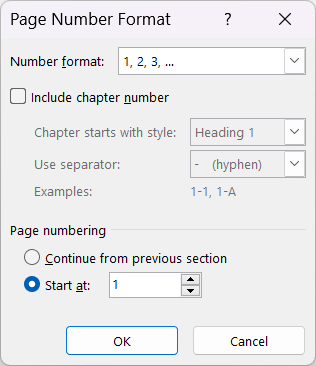
Now, the numbering will start from 1 on page 3 instead of continuing from page 1.
Step 5: Remove Page Numbers from the First Two Pages
- Scroll to page 1 and 2.
- Double-click inside the footer/header.
- Click on the page number and press Delete.
Since the sections are unlinked, this will remove numbers only from pages 1 and 2, while keeping the numbering from page 3 onwards.
Troubleshooting & FAQs
Page numbers are still showing on the first two pages.
✔️ Ensure you have unlinked the sections properly (Step 3). ✔️ Make sure you only deleted the numbers from Section 1.
Page numbering does not start from 1 on page 3.
✔️ Check Page Number Format settings (Step 4) and ensure “Start at: 1” is selected.
I want Roman numerals for the first two pages and normal numbers from page 3.
✔️ Go to Header & Footer → Select the section for pages 1-2.
✔️ Click Page Number → Choose Top of Page / Bottom of Page and select location of page number as per your need. 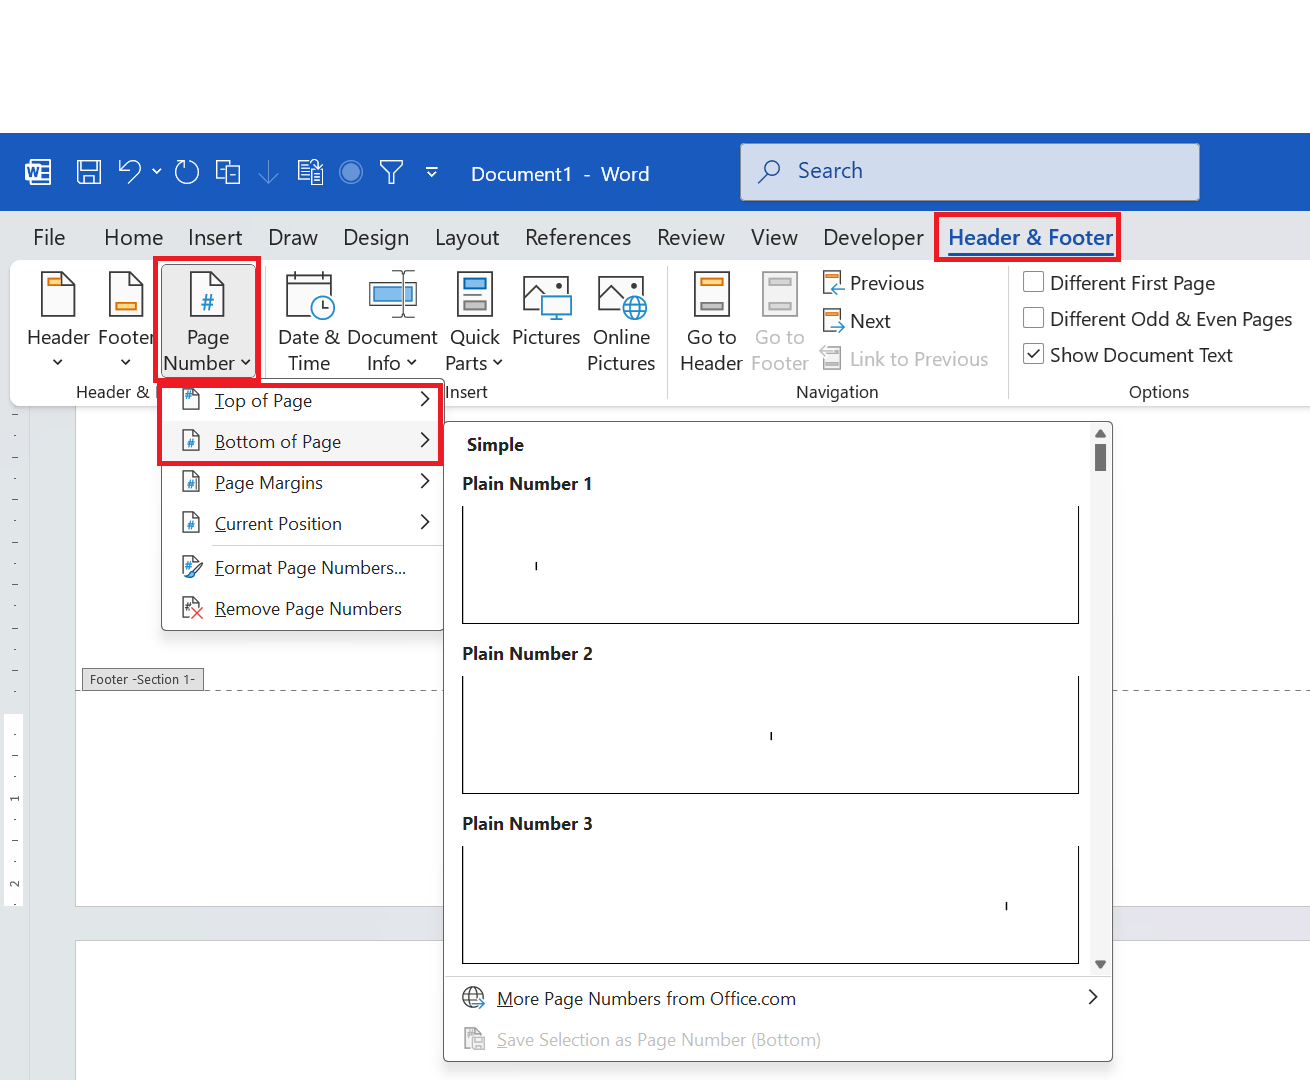
✔️ Click Page Number → Format Page Numbers → Choose Roman numerals (i, ii, iii). 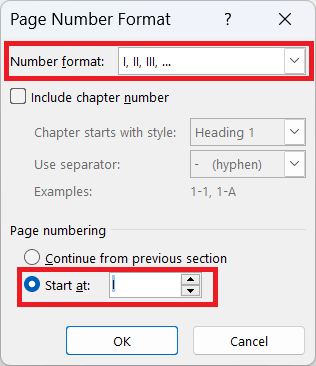
✔️ Follow the steps above for page 3 onwards with normal numbers.
Final Thoughts
Starting page numbering from page 3 in Microsoft Word is simple once you understand how section breaks and unlinking headers/footers work. Follow this guide, and you’ll be able to format professional documents effortlessly!
Did you find this helpful? Share your feedback in the comments! 🚀
Related Posts

C P Gupta is a YouTuber and Blogger. He is expert in Microsoft Word, Excel and PowerPoint. His YouTube channel @pickupbrain is very popular and has crossed 9.9 Million Views.