This blog explained the steps to install Anaconda Python on Windows.
Anaconda is the most popular, free and open-source distribution of Python and R Programming language. It is used for large-scale data processing, predictive analysis and scientific computing. The Anaconda distribution is used by over 15 million users and includes more than 1500 popular data-science packages. It comes with bunches of tools such as Sypder & Jupiter notebook.
So lets see how we can install anaconda in Windows Operating system.
Firstly, visit anaconda.com on your browser.
Once the website is open, on the right side you will see Download button (Green Color), just click on it.

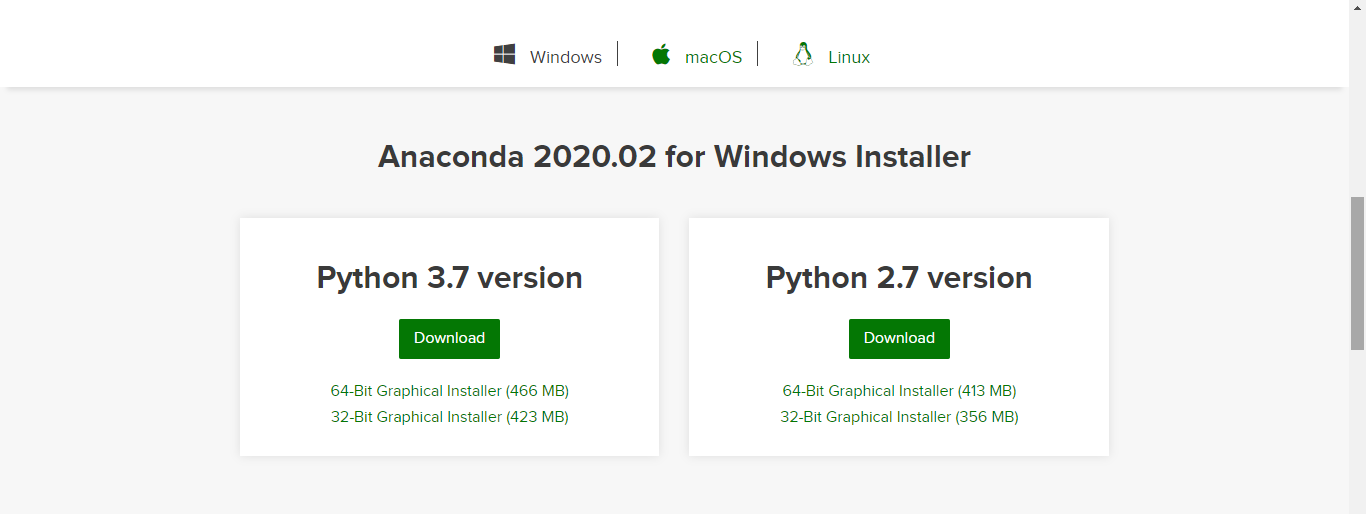
And once download section is open, you can see that we have multiple operating system options. Select the OS on which you want to install Anaconda. Here, we will show you how to install Python (Anaconda) on Windows, but the procedure is identical if you are going to use the Mac or Linux version.

Do you need a 2.x or a 3.x version? We recommend to download latest version. And then there is a 32-bit or a 64-bit version, depending on the windows you have installed.
Newer computers are surely running with a 64-bit processor, but if you would like to verify this, click on start menu and search for This PC (My computer), go to properties, check the information referring to the “System Type” in System block.
In my case, it is 64-bit, so I will select 64-bit 3.7 version.

Then, we must find a directory where we want to install Anaconda and press “Save”. When the download has finished, please double click on the file to run the application.
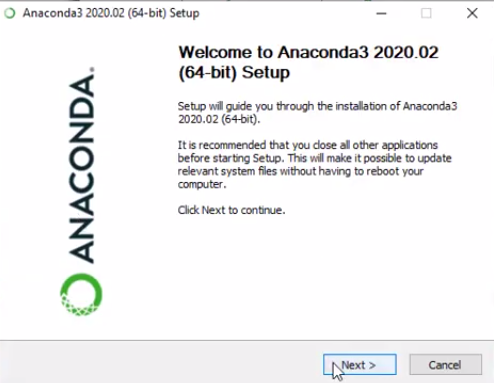
What follows is nothing different from the standard windows installer. Agree and press “Next” until you have the chance to specify a destination folder.

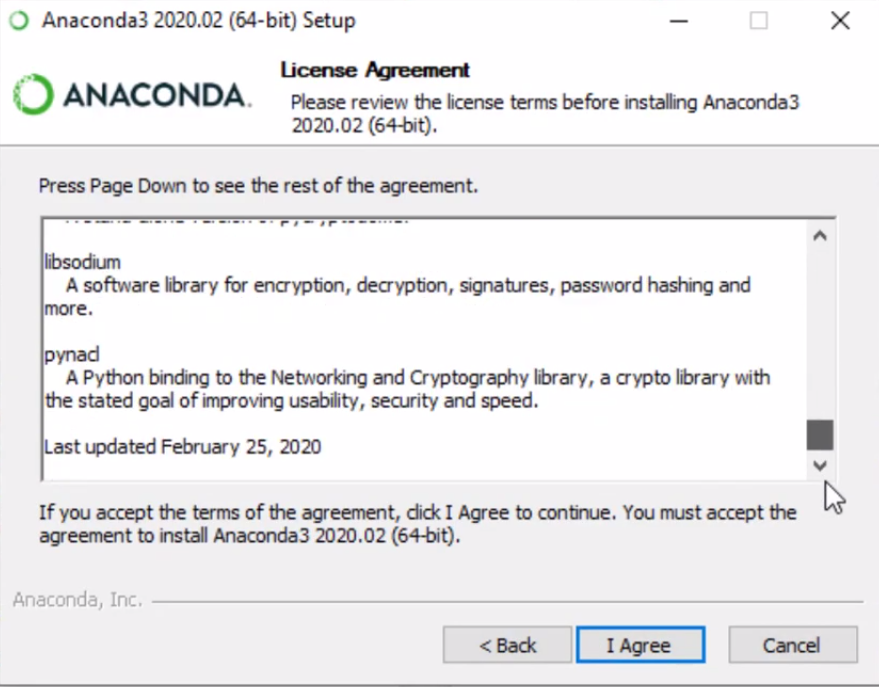
Read the License Agreement and click on “I Agree” to accept and proceed.

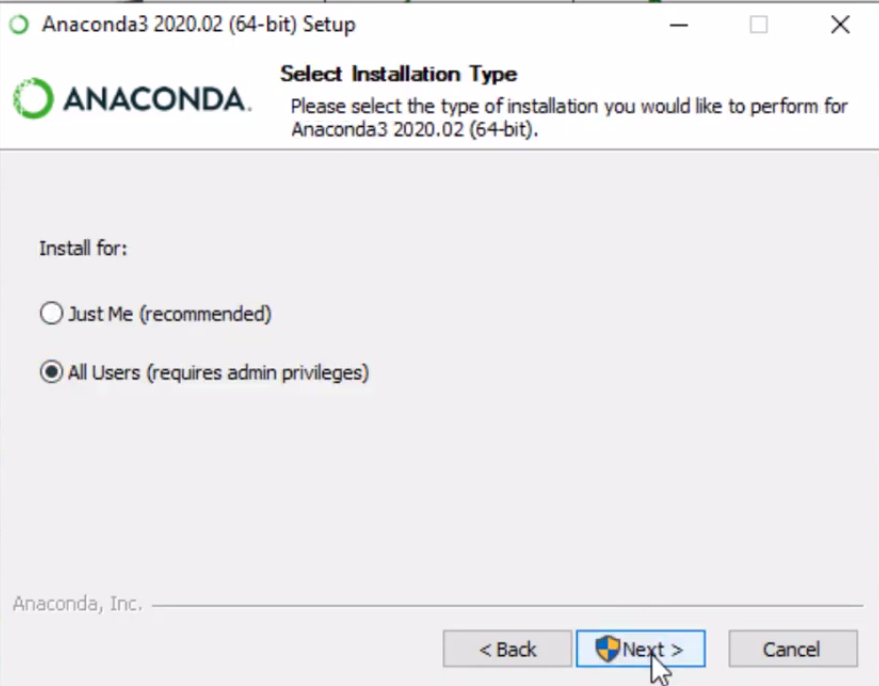
If you want to install Anaconda for all users, Select “All users” or else select “Just Me” to install Anaconda for current user.

Press “Next” until you have the chance to specify a destination folder, which looks like the figure showing below
You can also browse the location where you want to install your Anaconda, by selecting the “Browse” button. Once you select, click on the next button.

Finally, click “Install” and proceed.

We just showed you how to install Python, Spyder and Jupyter (through Anaconda Distribution). Now you should have Python installed in your Windows along with many applications and packages including Spyder and Jupyter.
Spyder is an Integrated Development Environment (IDE) for scientific computing, written in and for the Python programming language. It comes with an Editor to write code, a Console to evaluate it and view the results at any time, a Variable Explorer to examine the variables defined during evaluation, and several other facilities to help you effectively develop your programs.
To open Spyder, click start menu, search Anaconda and click on Spyder. A new window will pop up. It will take a few seconds for the App to load.
To check the version of Python, click start menu, search Anaconda Prompt

Once it opens, type “python –version” and press enter, it will show the installed version in your system.
If you have any question, please leave a comment below.

C P Gupta is a YouTuber and Blogger. He is expert in Microsoft Word, Excel and PowerPoint. His YouTube channel @pickupbrain is very popular and has crossed 9.9 Million Views.